- Home
- How to Make a Basic Wig
- Sew-in Lace Wig
How To Sew In A Lace Wig
(another way to wear your lace wig without using adhesives)
"I'm curious about how to sew in a lace wig, do you have any pointers?"
Learning how to sew-in a lace wig is a lot easier than you might think and it's a great way to wear your lace wig without using adhesive.
The amount of sewing you'll need to do will depend on how often you intend to remove your lace wig in order to access your own growth hair for things like treatments (moisturizing, masks etc.) deep washes, conditioning, or just wearing another look.
Why sew-in a lace wig?
Sometimes you don't want to use tape or glue on your lace front wig; other times, you might want a break from using lace wig adhesives or maybe perspiration affects your tape or glue.
Maybe you don't use adhesive at all but want to stop your lace front wig from moving when exercising or just carrying out daily activities and errands.
Whatever your reason for wanting another way to secure your wig in place, sewing your lace font wig into your own hair or onto a wig cap is as easy as 1-2-3
Tools you will need to sew-in your lace front wig
- Curved needle - the ones normally used for hair weaving wefts.
- Weaving thread (or any good quality thread)
- Scissors
- Stocking Cap (or elasticated wig cap) - Optional
- Your phone (to take photographs of where you stitched your lace wig in case you forget how many rows of stitches you did) - Optional
That's it!
How To Sew In A Lace Front Wig
Prepare your hair; braid your own hair into canerows (cornrows) or single braids; or put on your wig cap if using one.
Step 1a Put on your lace wig
Put on your lace wig first and ensure that your lace wig sits on your head exactly where you want to be, because this is where it will sit until you remove it.
Step 1b Ensure a comfortable fit
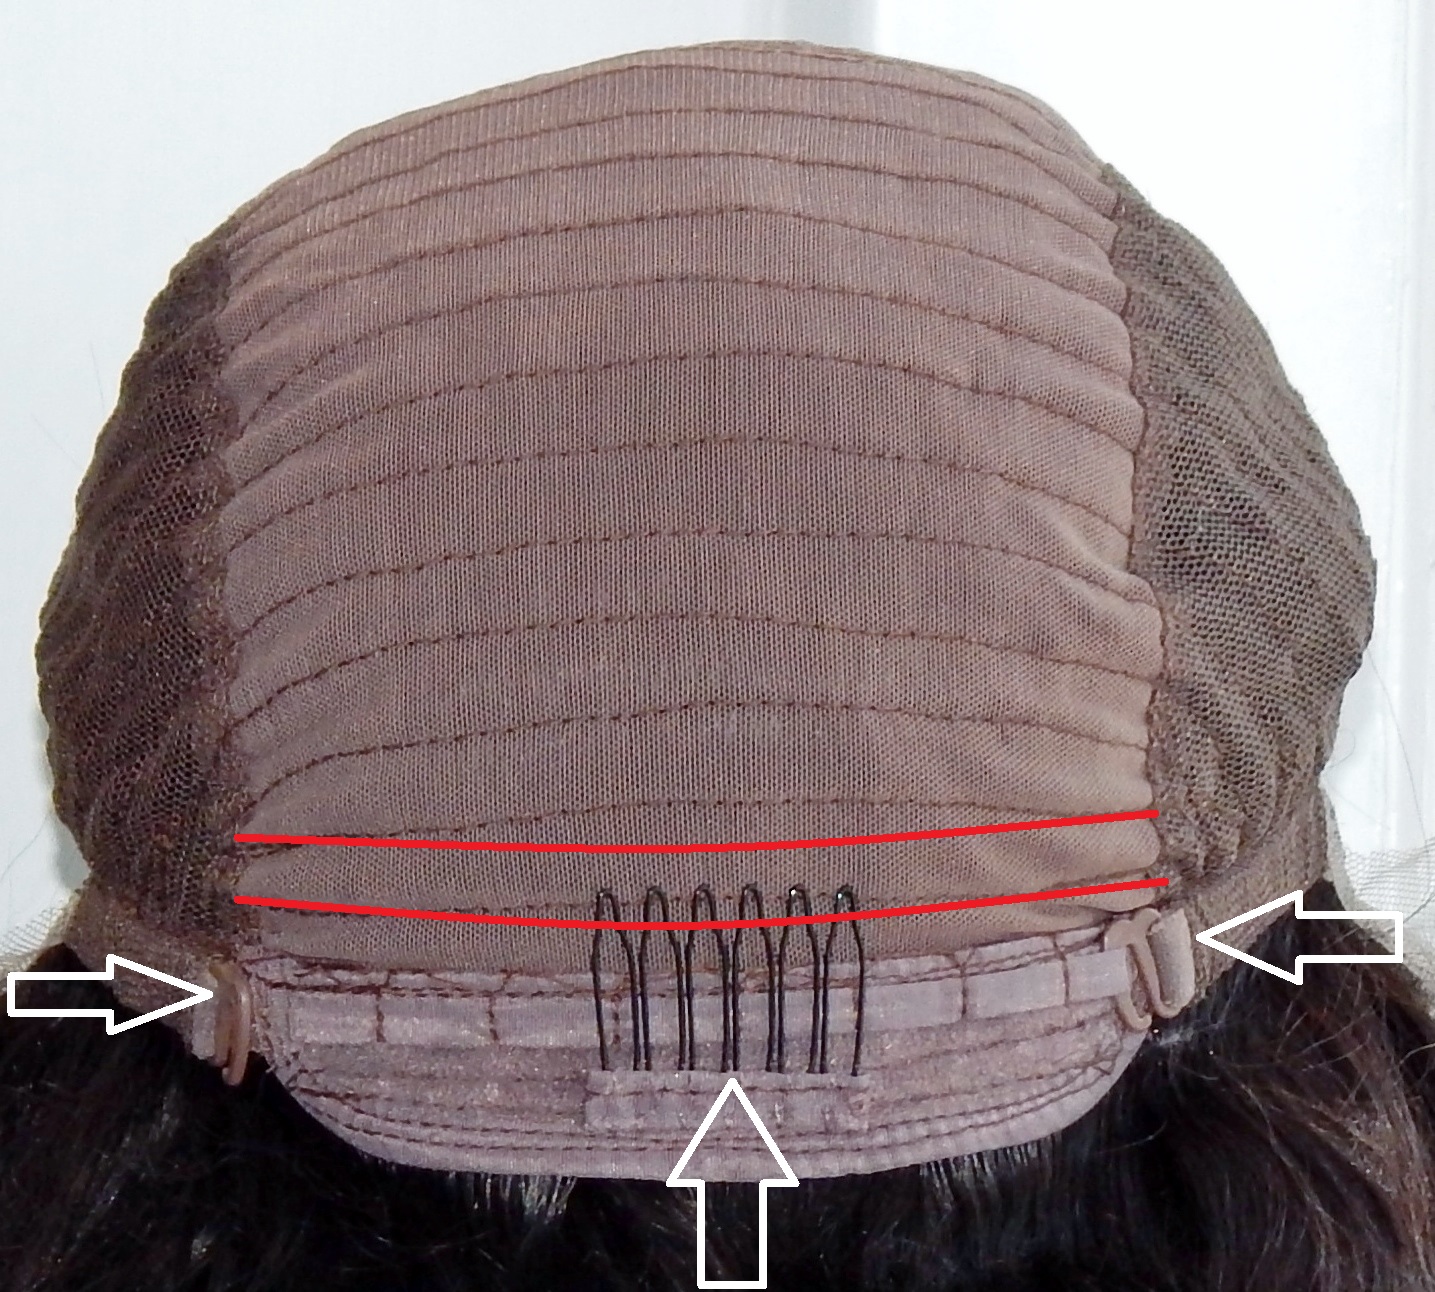
Secure your lace wig with a comfortable fit by using any adjustable straps and clips on the lace wig - indicated in the image with white arrows.
Step 2 Stitch tracks at the back
Start at the back of the lace wig.
You should be able to feel the tracks with your fingers.
Section and clip hair away from each track as you work.
Using your curved needle and thread, sew along the first and second track at the back of the lace front wig - or to be technical; at the nape of the neck (red lines in image)
You can sew just one row or two or more, it's entirely up to you, this guide is for illustrative purposes.
Remember: The stitches you make are to keep the wig from moving and not to tighten the fit.
Tension on your hair can lead to weakened hair follicles or breakage.
If you feel tightness from your stitches when you move your head left to right or up and down, then your stitching is too tight, so loosen them.
This is a guide to learn how to learn how to sew in a lace front wig so take your time and don't worry if you make mistakes, you can always undo your stitches and start over.
Step 3 stitch at the sides
Section and clip hair away from each track as you work.
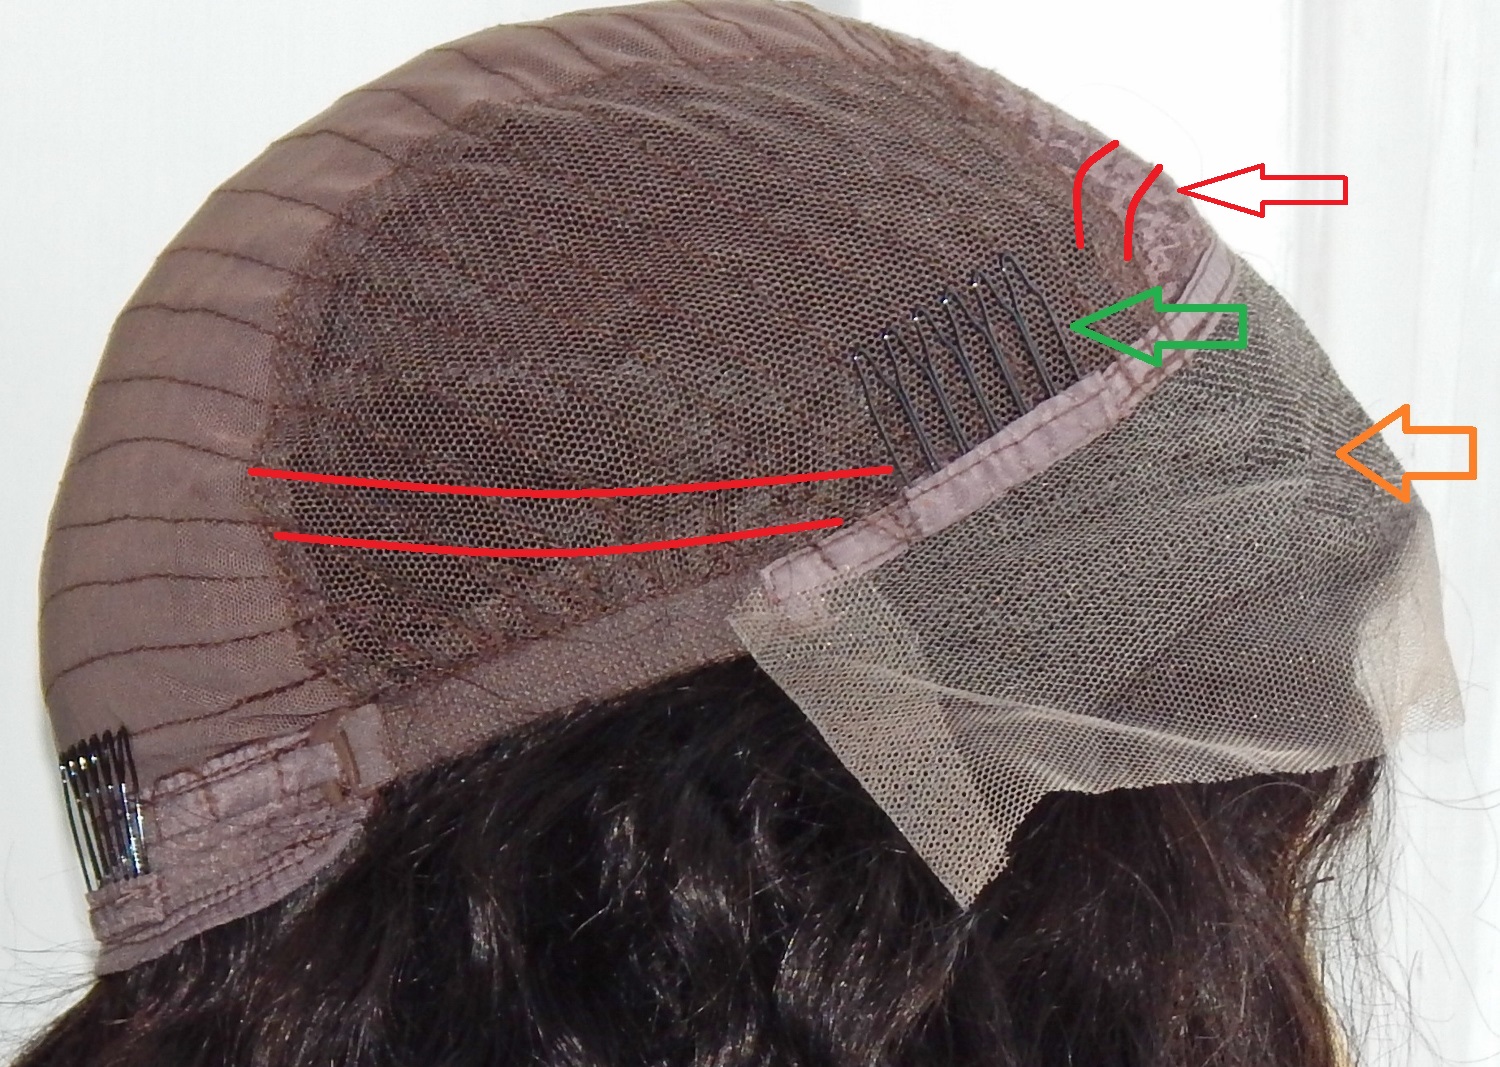
This might sound obvious but if you're new to learning how to sew in a lace front wig then remember to... make sure the lace at the front of the wig is lying flat against your head (orange arrow)... ...and make sure any clips are secured into your own hair (green arrow)
Using your curved needle and thread, sew 5-10 cm from your temple above your ear towards the back of the wig.
You can stitch as far back as you wish, but a 5 cm length will secure your lace front wig.
You can sew just one row or two or more, it's entirely up to you, this guide is for illustrative purposes.
Step 3b stitch the crown - optional
You can also sew in your lace wig at the crown.
You can sew one or two short lines of stitches at the top of your lace front wig next to where the lace stops - (see red lines with the red arrow in the image)
Step 4 - how to sew in a lace wig... photograph your stitches.
This step is totally optional!
If this is your first time learning how to sew in a lace front wig and you decide to stitch a different number of rows in each area of the lace wig, then why not take pics of stitched rows.
It'll mean that when you undo your stitches you'll know how many rows to you stitched and you won't be left scratching an un-stitched area of your head, wondering why your lace wig is still attached.
Hooray!
You've just learned how to sew-in a lace wig!
If you want to be the first to know about our next guide about how to make wig or anything else to do with lace wigs, hair extensions or hairpieces, then why not join our blog, it's easy to do and doesn't require an email address.
Jump from How to Sew-In A Lace Wig to Q&A Page
Jump From How to Sew-in A Lace Wig to Home Page


