- Home
- Make Your Own Wig
- Attach Lace Closure
How to Apply Lace Closure
How to attach lace closure to your DIY wig or hair weave
Hey there DIYers, this guide shows how to apply lace closure to complete your DIY wig or hair weave.
When it comes to completing looks you can either make your own closure piece by rolling up a small piece of hair weave, or you can use a purpose made closure piece.
This guide is just about attaching a lace closure piece (sometimes called installing a lace closure piece... it's just that the word "install" seems like it should be used new kitchens rather than new hair...) so it doesn't cover the whole wig or weaving process, but if you want to find out how to make your own wig using hair weave, then check out the DIY Wig Guide to see how it's done.
Apply Lace Closure to DIY Wigs and Hair Weave
Top Tips:
Adapt this guide to suit your situation.
This guide shows how to sew-in a lace closure piece.
You can always use glue to attach the lace closure and if that's your preference make sure you also have bonding glue remover to clean up any excess.
Hmm... What about cutting fringe (bangs) into a hair weave after applying the lace closure to the hair weave or DIY wig?
Good question, check out the guide to cutting your own fringe bangs into hair weave.
Remember you can click on images to enlarge... but for now, let's get started with tools!
Tools to Apply Lace Closure
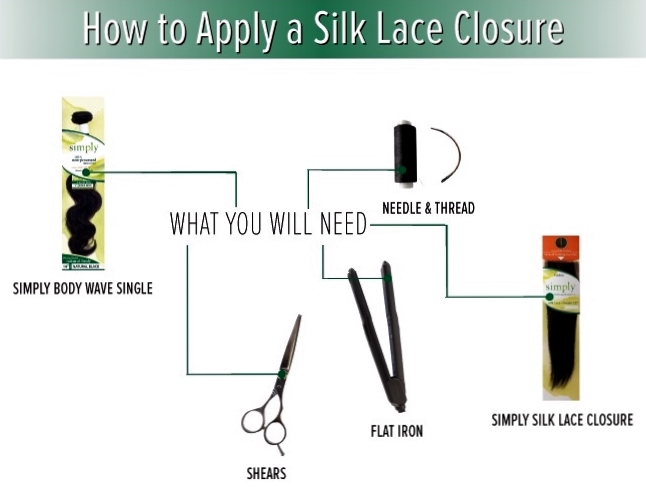
- Your almost completed hair weave or DIY wig
- Scissors
- Thread and curved needle for the sew-in method
- Bonding Glue (for the no-sew method)
- Bonding Glue Remover (hey, we all make mistakes, right?)
- Lace closure piece
- Polystyrene (Styrofoam) or mannequin head
- Pearl head pins to pin lace closure in place before sewing or gluing
- Hair straighteners to smooth
How to apply lace closure to your DIY wig or hair weave
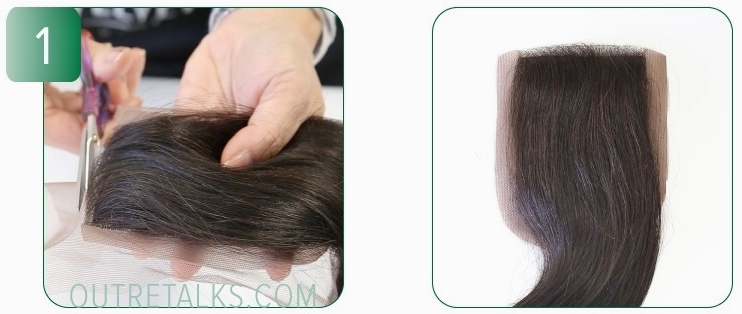
Step 1: Cut the lace
Cut the excess lace around the perimeter of the lace closure.
Leave about 1 cm (0.5 inch) of lace around the two sides and the back of the closure.
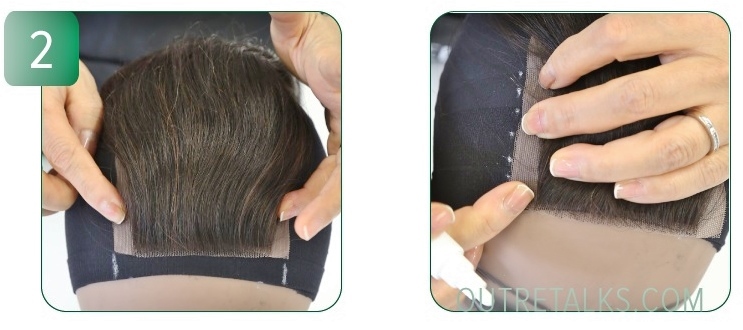
Step 2: Mark the front position of the lace
At the front of the wig cap, mark the attachment points of the front corners of the closure.
Align the front of the closure with your natural hairline and trace the edge of the closure around the perimeter.
This will show you where the closure will be placed.
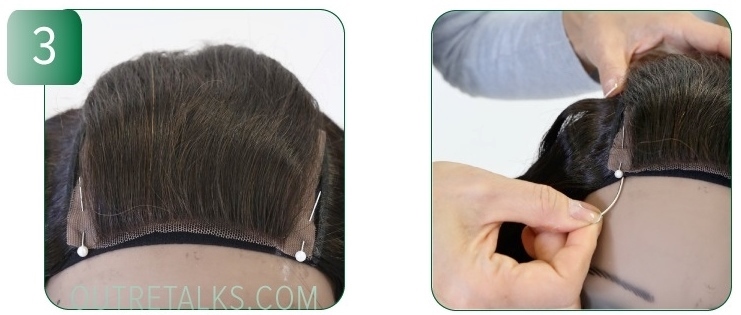
Step 3: Pin the lace in place
Use the pearl head pins to pin down the lace closure to the stocking wig cap.
Make sure the closure is lying flat.
Start sewing (or gluing) the lace closure to the wig cap.
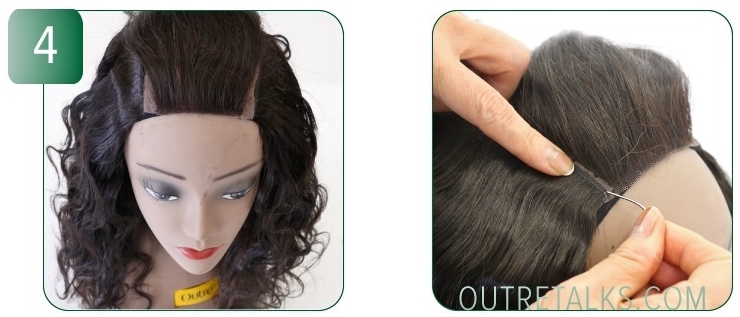
Step 4: Cover lace with additional row of hair weave
Once the lace closure is securely attached, sew or glue one more row of hair weave on top of the 1 cm perimeter of lace to cover the lace and add fullness to the top.
Step 5 (Optional): Use heat straighteners
That's a wrap on how to apply lace closure... but if you want a defined parting, all you have to do is decide where you'll part the hair and then use your hair straightener to gently press the hair down at the parting to direct the hair.
Images and basic steps about how to make a wig can be found at http://www.outretalks.com/
Well spaghetti and sauce! You've just learned how to attach a lace closure to your DIY wig or hair weave in four speedy steps!
While you're sitting there looking all lace closure pretty, why don't you share your thoughts about this DIY guide or any tips or ideas using the form below and then join our blog, to keep up with the next article or how-to guide - no personal info required - hooray!
How will you make your own wig?
Do you think you'll take the plunge and make your own wig? Will you sew or use glue?
Why not share your ideas about this wig-making guide or your plans for making your own wig.
If you want to be the first to know about our next guide about how to make wig or anything else to do with lace wigs, hair extensions or hairpieces, then why not join our blog, it's easy to do and doesn't require an email address.
Jump from Attach Lace Closure to Hair Weave and Wigs to Q&A Page
Jump From Attach Lace Closure to Hair Weave and Wigs to Home Page

